Davinci Tutorial: Color Grading for Beginners in 8 min

Learn how to color-coordinate your projects and adjust their colors with Sonia Abellán's primary grading technique.
Color grading is one of the most important jobs in the production process of an audiovisual project. It allows us to explore the expressive possibilities of color to provoke sensations in the viewer.
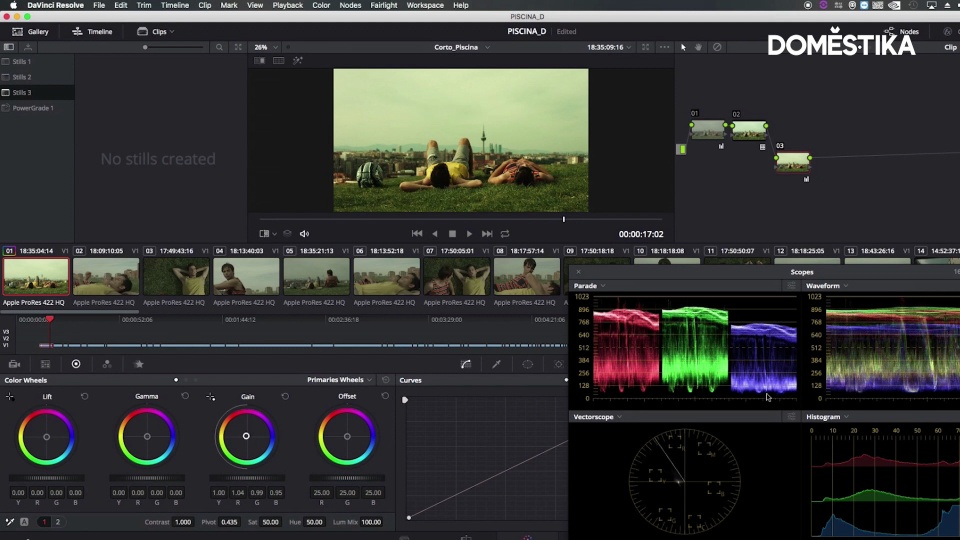
In this tutorial, colorist Sonia Abellán Avilés (@soniabellan) gives us a series of tips to start a digital color grading process and adjust primary colors and lighting using DaVinci Resolve.
1. Choose a reference frame
To start the color grade of an audiovisual project, we will choose a frame that we like and is representative of the rest of the video in terms of aesthetic and light. This will mean the adjustments we make can serve as a basis for the rest of our sequences.

2. Color and light correction
To start the color matching process, we will start from two nodes (remember that to create a new node, you can use the shortcut Alt+S) and the first thing we will do is a white balance. To do this, we will take out our Scopes and use them to increase the light in our frame, playing with their levels a little to see how far we can go without the image and its light losing quality. Using the Scopes, we can also see if any other color predominates in our blacks, and adjust them accordingly. We will also use them to retouch the contrast until we find a point that convinces us.
Then, we can see in Parades if one of the colors is too dominant over the others. If this is the case, we will reduce its presence and balance it with the other colors.
As we edit, we may create a marked contrast in which the blacks in the image are so dark that light information is lost. To fix this, we can recover light information through the first node, which we will always leave in case we want to fix some element of our edition that doesn't convince us.

3. Use masks
If we are satisfied with the color of one section of the frame, but we see that the other still needs modification because the light and the color are very different (for example, in planes where the earth and the sky appear at the same time), what we should do is to start working with masks on a secondary area.
To do this we will create another node with Alt + S and mask the part of the frame we want to keep. We will choose the shape of the mask that best suits our needs and isolate the area we are interested in in order to adjust its colours.

4. Fix specific colors with Curves and Qualifier
Another option, if we notice that a color in our plane has a hue we want to change, is to create a new node and use the Curves tool, choosing the Hue vs Hue option. In this way, we can select the color we want to change and experiment with the Curves until we reach the shade we want.
If we see that this causes other colors that we wanted to keep to change as well, we will use the Qualifier tool and select the color we are modifying again. Once this has been done, we can define in more detail the color that will be affected by our modification to the curves.
Alternatively, if you find that this modification generates noise in the color, you can increase the Blur Radiuswithin the Matte Finesse section, which will smooth the pixels to make them look better.

5. Check the original frame periodically
Using the Shift+D shortcut, we can quickly see what the raw material looks like, which will help us to evaluate the work we have done by observing the differences in colour. It’s good do this throughout the project so not to lose sight of our starting point.
Another interesting feature is to use [b]Command+F to see the plane we are working on in full screen , which is also very useful to assess how the process is going.

6. Use the result as your master frame
Once we have finished with our colour grading, we will right-click on the image and select Grab Still This way, the image with all the corrections will be saved in a column on the left of our workspace. When we move to another frame, if we keep the right button pressed and drag it over the new frame, we will be to clearly compare the two images and ensure they are equal and the color of our project is cohesive.

Now that you've got some basic tips to help you enter the complex world of digital color grading and DaVinci Resolve, you can start editing your audio-visual projects with the keys you've learned.
If you liked this tutorial, remember that you can learn how to work with color correction and guide the emotions in an audiovisual project in Sonia's online course Digital Grading with DaVinci Resolve.
You may be interested in:
- Introduction to DaVinci Resolve for Color Correction, a course by Juanmi Cristóbal
- Professional Color Correction with DaVinci Resolve, a course by Leo Fallas
- Filming for Beginners, a course by Yeray Martín Perdomo


0 comments